I began the learning process with much frustration of trying to get started. It took me awhile to realize that I was missing the VCP drivers necessary to use with the Arduino program and was also not selecting the correct serial port and board in Arduino. I was so happy to finally get a simple Blink program (Arduino example) working. After that I went on to learn about accelerometers and soon XBees.
 |
| Experimenting and learning |
 |
| Experimenting with Xbees |
My overall goal was to read in Mimi's arm and leg movements to further move the visuals projected on the screen. Ideally it would have been great to have 4 accelerometers (one for each arm and leg) but for the sake of my sanity, I minimized it to 2 accelerometers (one for her right arm and one for her left leg). The purpose of the Xbee is to transmit the accelerometer data to Antoinette's computer (where her Processing program is running). Her Processing program will read in the data which will then be used to affect the surrounding wave forces. Getting the Xbees set up and communicating was another set of frustration. Luckily for this awesome tutorial, I was able to get things moving.
After much experimentation, I was finally ready to sketch out the circuit design...
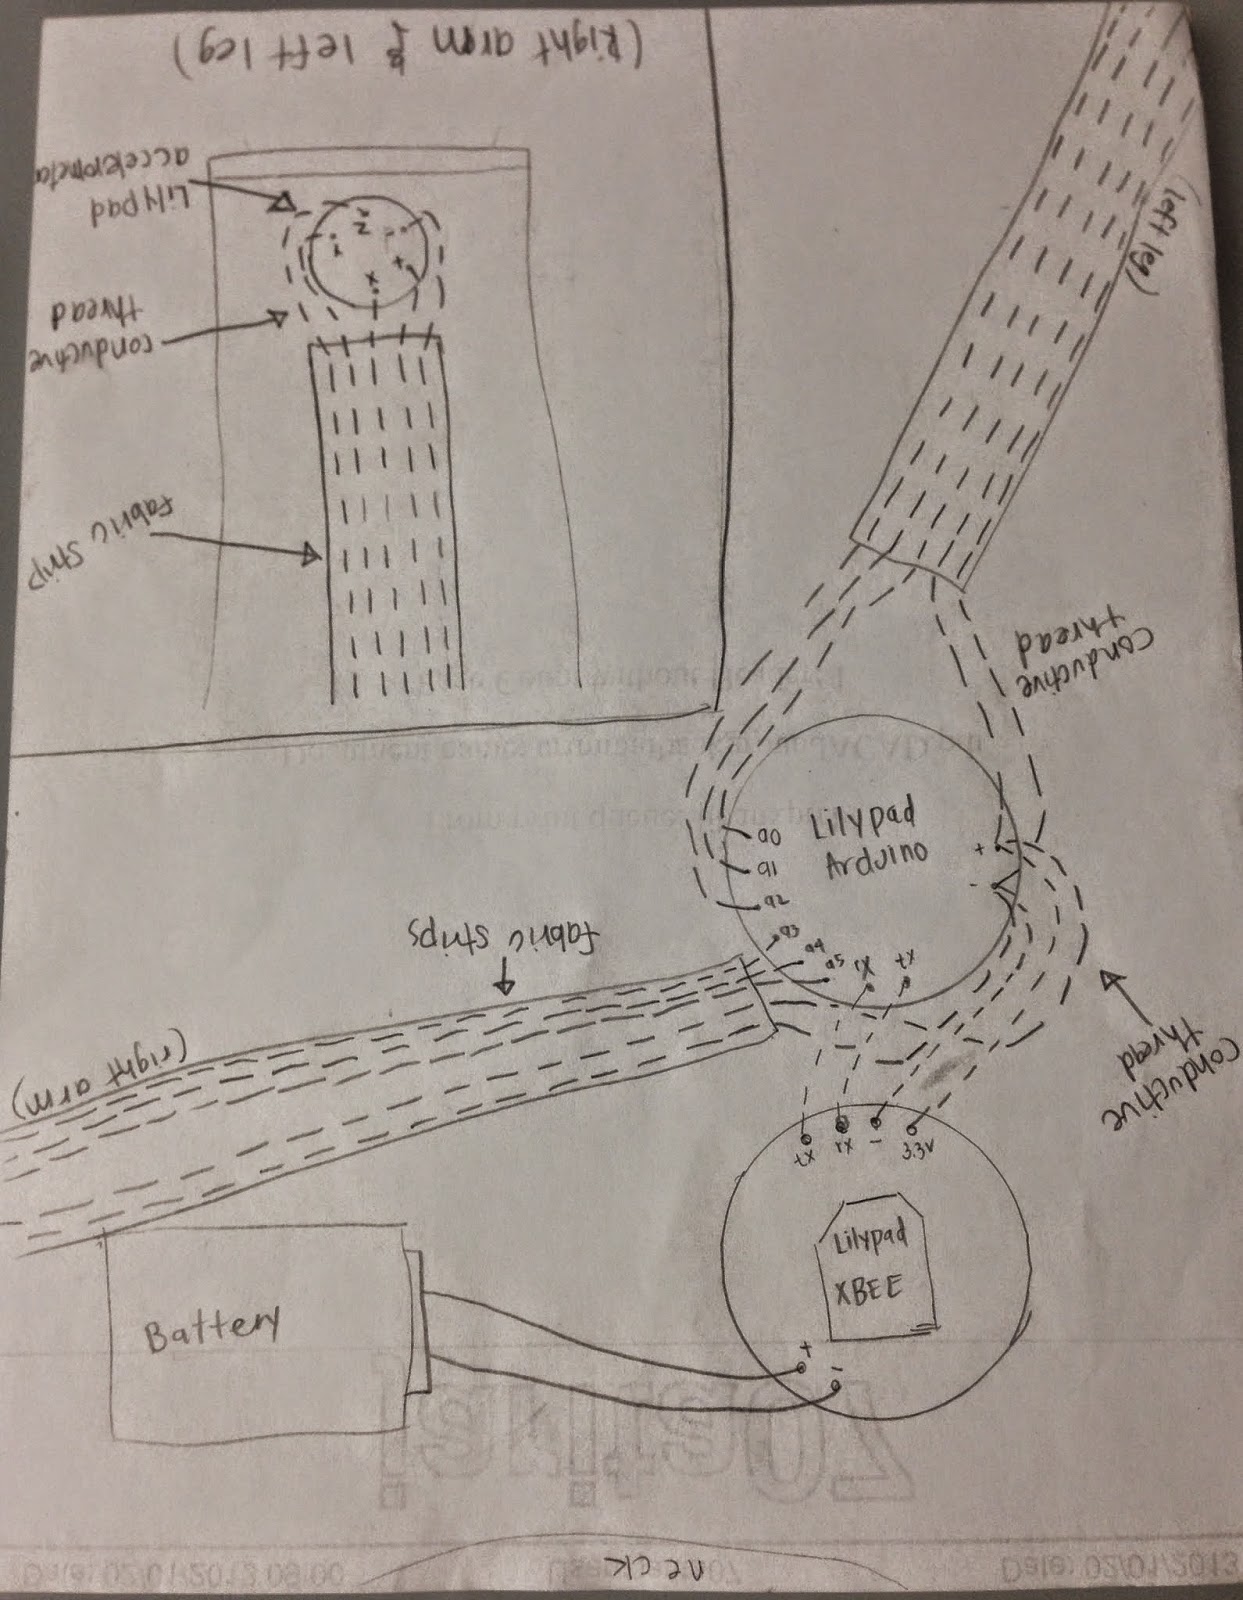 |
| Circuit Design |
 |
| Circuit Design |
 |
| Close up circuit design of fabric strips connecting to accelerometers on Mimi's ankle and wrist |
And after lots and lots of sewing....

Antoinette and I worked quite a bit together to figure out the next few steps. First I had to figure out a way to interpret the accelerometer values before sending the accelerometer input to her laptop. This page was a great source of information that helped to convert the values to 0 to 360 degree values for X, Y, Z. If I needed to change the program, I could upload any new program to the LilyPad Arduino. Once that was done, we had to figure out a way to get her Processing program to receive the values from the XBee that would be on Mimi's costume. We were "easily" able to get the values read into CoolTerm running on her computer but it took more time figuring out how to get her Processing program to read in the values. After successfully getting the values read in for one accelerometer, I attached a second accelerometer to the costume and Antoinette adjusted her program to receive the values from both accelerometers. After that, Antoinette integrated the new incoming data from the accelerometer with her existing program. She was successfully able to get her program working with the new input from Mimi's movement. We will still have to work on tweaking the values and possibly adjusting the accelerometer positioning on the costume.
And here's our result...
 |
| Testing out sewn circuits with Kinect and laptop |
Yahh I was soooo relieved that everything was working. After very tired eyes from LOTS of sewing and MUCH anxiety about the conductive thread connections, it all paid off.
Now time to test it out on the screens and add extra reinforcement to the stitches and any potential shortages.
No comments:
Post a Comment