Here's a video showing our first test of projecting our visuals onto the screens.
The projector is currently positioned front and center of stage and projecting directly at the screens. We are still figuring out positioning of screen, Kinect, and projector. Today we just tested out the visuals on the screens and played with screen layout. We discovered that the Kinect was not reading Mimi when she went back stage. We will have to figure out side lighting to make sure the Kinect can read her.
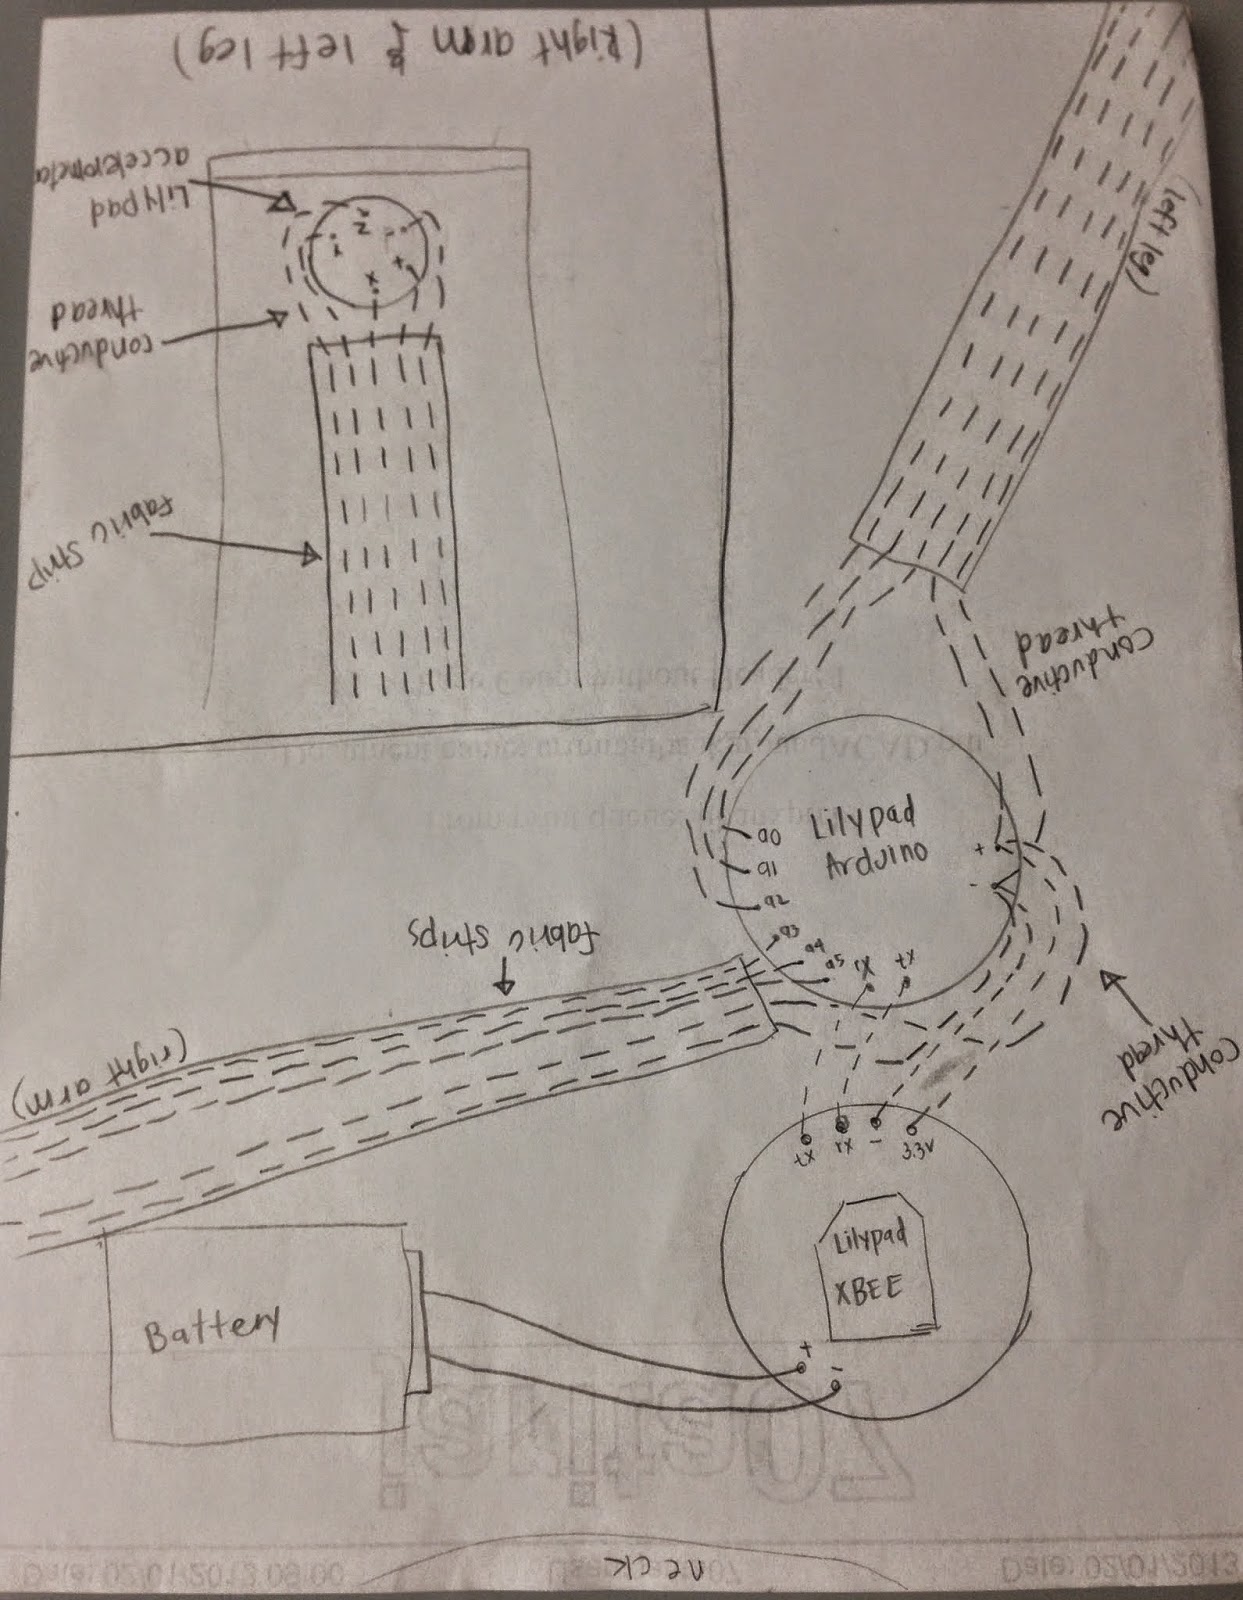
Let me caveat this post by mentioning my lack of knowledge about circuits, Arduinos, accelerometers, and such. Now, 12 days later, I have successfully connected and constructed together 2 accelerometers, 1 LilyPad Arduino, 2 XBees, and a battery pack using red felt fabric, a red unitard, and a lot of conductive thread. Woohoo!!
I began the learning process with much frustration of trying to get started. It took me awhile to realize that I was missing the VCP drivers necessary to use with the Arduino program and was also not selecting the correct serial port and board in Arduino. I was so happy to finally get a simple Blink program (Arduino example) working. After that I went on to learn about accelerometers and soon XBees.
Experimenting and learning
Experimenting with Xbees
My overall goal was to read in Mimi's arm and leg movements to further move the visuals projected on the screen. Ideally it would have been great to have 4 accelerometers (one for each arm and leg) but for the sake of my sanity, I minimized it to 2 accelerometers (one for her right arm and one for her left leg). The purpose of the Xbee is to transmit the accelerometer data to Antoinette's computer (where her Processing program is running). Her Processing program will read in the data which will then be used to affect the surrounding wave forces. Getting the Xbees set up and communicating was another set of frustration. Luckily for this awesome tutorial, I was able to get things moving.
After much experimentation, I was finally ready to sketch out the circuit design...
Circuit Design
Circuit Design
Close up circuit design of fabric strips connecting to accelerometers on Mimi's ankle and wrist
And then begin the fabrication process...
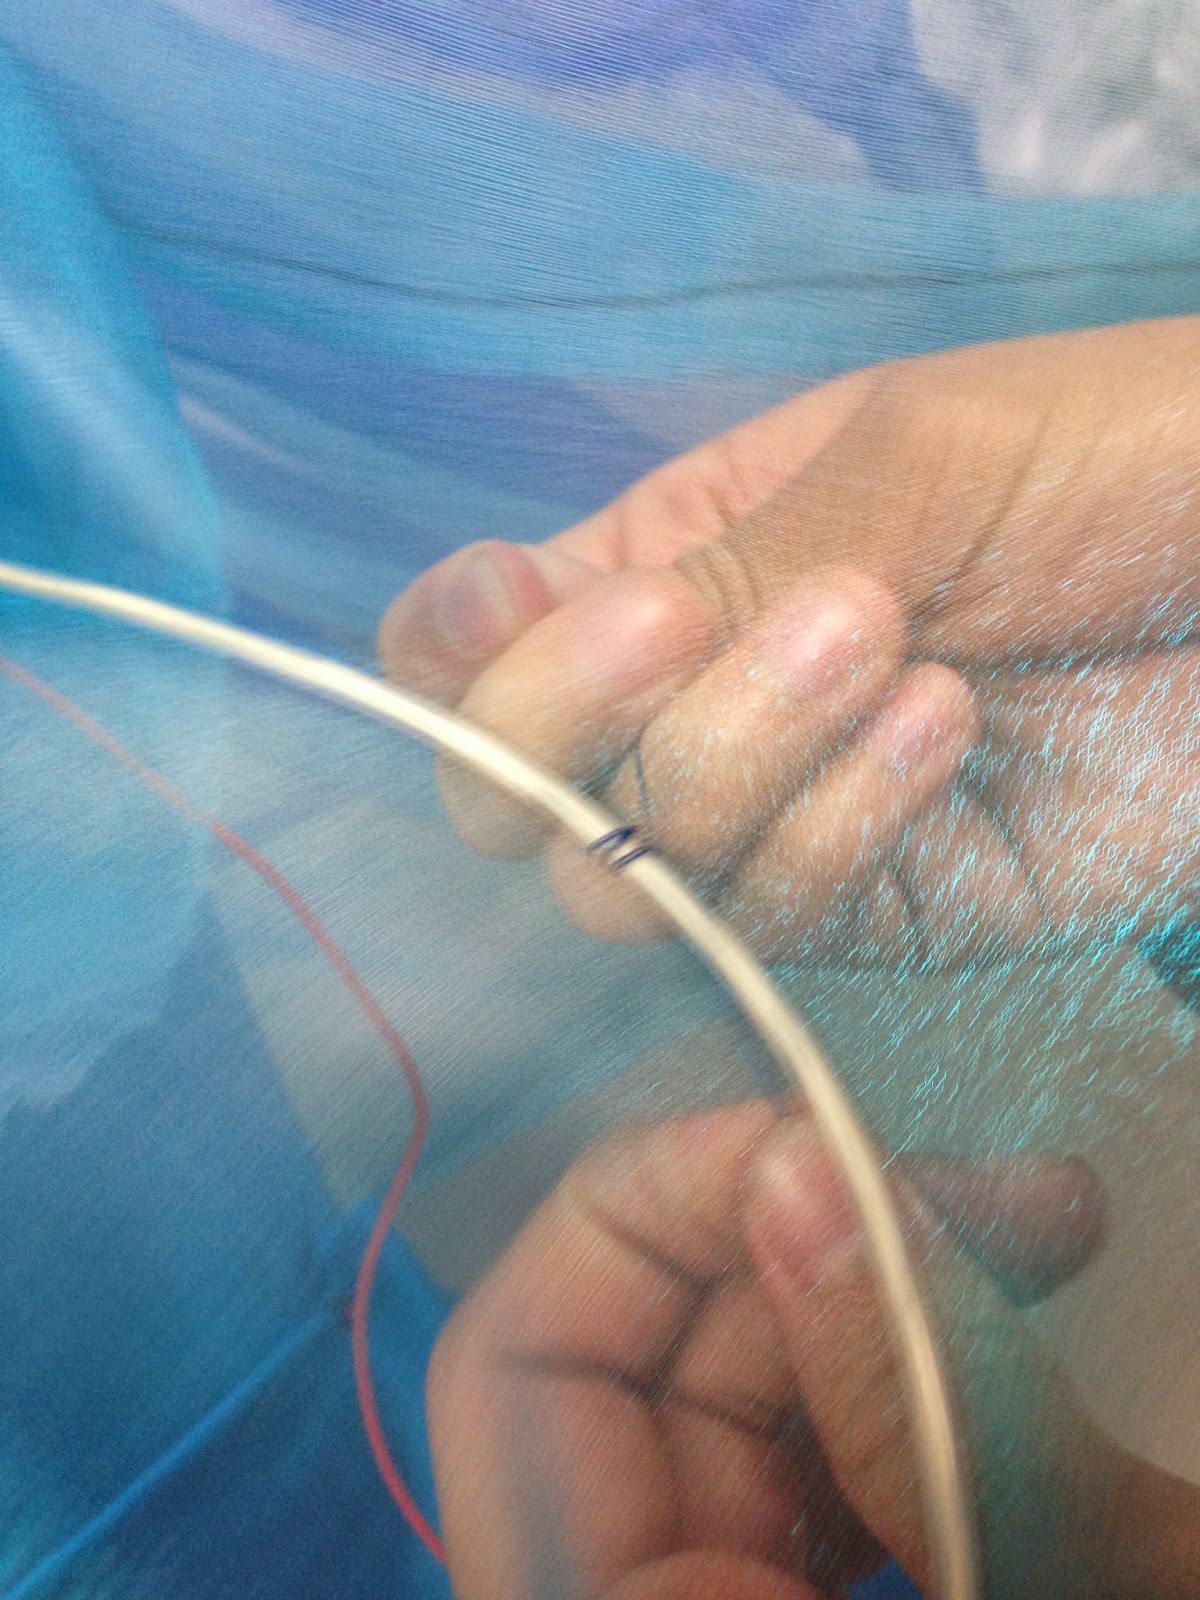
And after lots and lots of sewing....
Antoinette and I worked quite a bit together to figure out the next few steps. First I had to figure out a way to interpret the accelerometer values before sending the accelerometer input to her laptop. This page was a great source of information that helped to convert the values to 0 to 360 degree values for X, Y, Z. If I needed to change the program, I could upload any new program to the LilyPad Arduino. Once that was done, we had to figure out a way to get her Processing program to receive the values from the XBee that would be on Mimi's costume. We were "easily" able to get the values read into CoolTerm running on her computer but it took more time figuring out how to get her Processing program to read in the values. After successfully getting the values read in for one accelerometer, I attached a second accelerometer to the costume and Antoinette adjusted her program to receive the values from both accelerometers. After that, Antoinette integrated the new incoming data from the accelerometer with her existing program. She was successfully able to get her program working with the new input from Mimi's movement. We will still have to work on tweaking the values and possibly adjusting the accelerometer positioning on the costume.
And here's our result...
Testing out sewn circuits with Kinect and laptop
Yahh I was soooo relieved that everything was working. After very tired eyes from LOTS of sewing and MUCH anxiety about the conductive thread connections, it all paid off.
Now time to test it out on the screens and add extra reinforcement to the stitches and any potential shortages.
For our stage design, we would like to project onto multiple scrim curtains. The biggest issue with using multiple curtains however is...cost. We didn't realize how expensive scrim material could be! It cost the department over $2000 for the scrim in Sketch 2. And because we want to use multiple scrim curtains, we would need to cut up the material (which essentially means cutting up $2000).
Our solution...fabric shopping!
We brought our own mini projector to test out projections onto material
Tiffany testing out projections onto material
Mimi's costume will be red...so testing out red fabric behind the potential curtain material
In the end we went with the black power mesh fabric. The 35 yards of fabric cost us a total of $203.75, saving us a lot of money!
And here's the costume we ordered for Mimi off of Amazon....
Our second assignment is to create an interactive dance environment with projection mapping.
PROJECTION MAPPING EXAMPLE:
Here's an awesome example that Hwaryoung discovered...
TECHNOLOGY:
For this assignment we will be using a Kinet camera to capture the dancers movement. Based upon the movement, visuals will be projected onto a scrim. With a Kinect, we can collect movement data without having anything attached to the dancers body. We can collect the X, Y, Z locations of the dancer as well as track body part (hands, head, legs, etc) movements with skeletal tracking.
INSPIRATION:
Our group (Antoinette, Mimi, Tiffany, and I) wants to continue working with the ocean theme for our second sketch. When we were testing out the projections on the scrim, we realized how washed out the colors get on the black scrim, especially cooler colors. At one point when we were testing out a video projection, vibrant red tentacles on top of a blue background filled the projection and it was beautiful. Mimi was also dancing behind the scrim at the time and looked like she was interacting with the tentacles by repelling them away with her body. From then on, we decided to base our 2nd project on this idea.
DANCE MOVEMENT:
Our dancer, Mimi, will have to incorporate Laban movements into her dance movement.
We first had to figure out what type of material we wanted to work with. We knew we wanted something sheer/transparent/translucent so the EL lights could shine through and create diffuse light on the multiple layers of fabric.
Testing out fabric
The fabric we ended up purchasing
We also had to buy piping to create the structure of the skirt. We attached the piping using fishing wire tied to the waistband wrapped around Mimi's waist.
Piping for the bottom of the skirt
Testing out the piping
Construction of the skirt...
Testing out fabric
Top layer
Tiffany testing out the bottom layer
Woohoo...bottom and top layer!
Antoinette and I making some alterations
Woohoo, proud of the completed skirt! I made some mistakes such as not giving enough space for the piping and had to hand stitch around the pipes for extra support but I learned from my mistake and didn't do the same thing for the bottom layer! After all my sewing, I was able to insert the piping through the seams, insert the waistband at the top seam, and sew the ends of the fabric together to finish it all off.
My sad attempt at dancing
Once the skirt was completed, we could add the EL lights...
Small stitches to keep light in place
Added the light to bottom layer of skirt
And can't forget about the arduino board and wire construction (more pictures to come)...
Our first sketch assignment is to create an interactive dance costume while incorporating the theme of symbiosis.
It's free to interpret any way we please. Here is our interpretation...
Our inspiration comes from the jelly fish species. We love the translucency, fluidness with elements of contraction, and organic feel of its nature. Our dancer, Mimi will essentially become a jelly fish, interact with a jelly fish, and live in the environment of the jelly fish.
TECHNOLOGY:
We will be using a stretch sensor for the input and using EL light wire as the output. The stretch sensor will be wrapped around Mimi's rib cage area to read the resistance of the band as she inhales and exhales to expand/contract her chest. When she inhales/expands, the EL light wire will turn on and exhale/contract will turn the EL light wire off. The EL light wire will go off to on and on to off gradually in correlation to the input values as Mimi inhales and exhales rather than going from light on to light off (like a light switch).
EL Light Wires
Stretch Sensor
COSTUME:
We originally wanted to use LED lights for her top half of the costume and create a ripple effect with the lights but we felt that didn't match well with the input that we would be getting from the stretch sensor. We went from LED lights to EL light wires since we thought the output would match better with the input of Mimi's breathing pattern. The plan was to create a form fitting interactive top half of the costume and match it with a loose flowy pant.
arm sleeve sketch
Leotard
Gaucho pants
We really liked the look of this jelly fish and used it as inspiration for our costume. Our next idea was to create pants with the same shape as the jelly fish below.
The interactive pant costume then transformed to an interactive skirt costume. After adding the EL wire and piping to the pant, it would be extremely hard for Mimi to dance in. Having a skirt costume would allow for freer movement. We liked the layering idea from this dress...
STAGE DESIGN:
Here is our inspiration for how we would envision the stage design...


 It's free to interpret any way we please. Here is our interpretation...


.jpg)

.jpg)
.jpg)
.jpg)
.jpg)
.jpg)
.jpg)
.jpg)